I'm impressed. I did a DIY, took pictures of the process and it all even came out quite nicely.
I am stepping up my blogger game!
The best part is that I used items I already had kicking around (What? You don't stock gold spray paint in your house?), so I didn't spend any money either. This makes me happy because I've done projects before that were meant to be all thrifty and DIY but just ended up being a huge money drain...
And while I know people like to call polka dots a trend, it feels more like a classic. I'm hoping I'll use this clutch long after the word oxblood is a distant memory of 2012.
Below are the steps for my mind-blasting DIY...
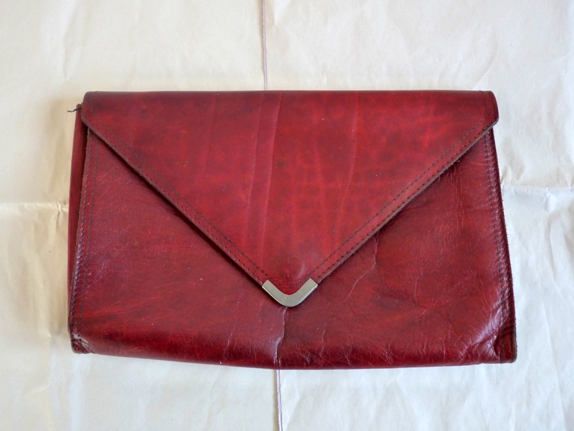
1. I thrifted this leather envelope clutch for $4 recently. I would usually be pretty reserved about spray painting a perfectly good classic leather clutch, but I have a few of these burgundy clutches. They seem to be an easy find at the thrift store.
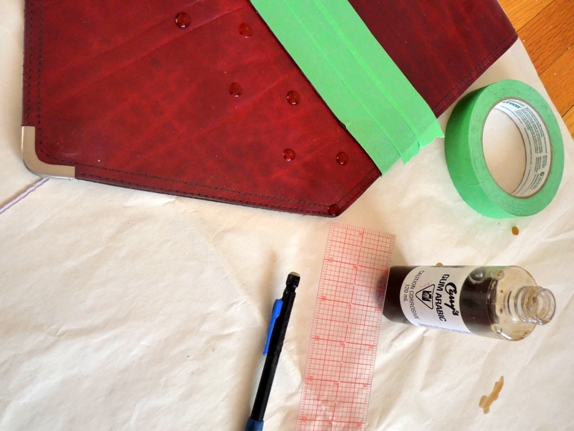
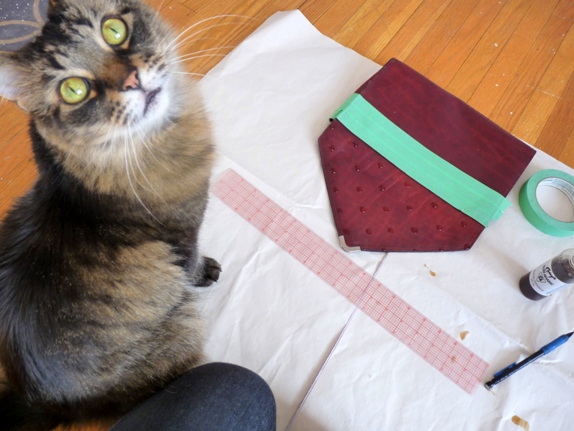
2. The back of the clutch was taped off and then I used Gum Arabic to block off a polka dot pattern. I used the eraser side of a pencil to blot out dots and a clear ruler to measure out the spacing. Then I had to wait very patiently for the Gum Arabic to dry. This part was difficult. In hindsight this could have been so much easier if I used Glue Dots because there would be no drying time and the dots would be pre-shaped but I didn't think of that until the end. Besides I've had that Arabic Gum since my first year university art classes so I might as well bring it out again... about a decade later.
3. This post wouldn't be possible without Kyle's close supervision. Not only is he adorable and fluffy, he is also shockingly good when I am working on stuff. He likes to be nearby so he can see every detail but he doesn't touch; just watches intently from an inch away. Thank you Kyle for your contribution.
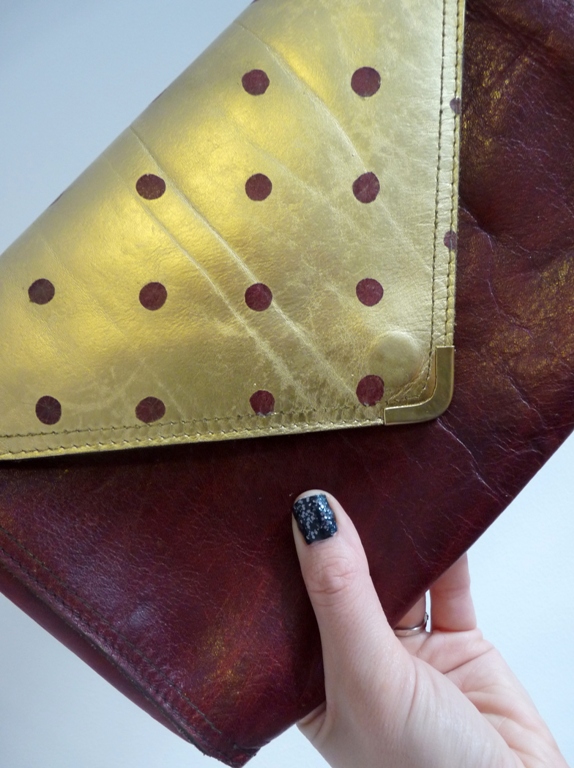
4. I spray painted the front of the clutch using some regular gold spray paint. It helps to test a little area inside the clutch to make sure the spray paint binds and sticks to the leather. When the paint dried, I carefully peeled and chipped the dried Arabic Gum away to reveal a perfectly adorable polka dot pattern.
This post offically makes me a DIY blogger*. Get ready world.
*or not. Sounds like work.
Full disclosure: I re-painted only my thumb nail for these pictures.


14 comments :
Oh yay, I'm first with a comment! Congrats, Jentine and Kyle, on your fab project. Can't wait to see your cool revitalized clutch turn up in one of your photo shoots.
So adorable! I like how you revamped this!
xoxo,
Laura
http://lauraisthriftingthroughlife.blogspot.com/
Aww, good work! It looks great! What is gum arabic actually used for in art? And isn't it edible? I feel like I've seen it in ingredient lists. Or maybe I'm confusing it with something else. I should probably just google these important questions instead of asking you, but I just had a cocktail, so I guess I'll leave you this comment before I do that.
Also, you are lucky to have such a well-behaved cat to help you with projects. Mine all think climbing on top of the project while I'm trying to photograph it is a good time. Once I made an animated gif to illustrate this. http://transientexpression.com/wp-content/uploads/2012/11/cat-plaid.gif
I should borrow Kyle to help train them.
Really inspiring! Well done.
That is definitely my level of DIY! Looks great and if you get sick of it, just spray paint it a new color!
brenna
sooooooooooo trying this!!!!!! what an amazing tutorial!!!
xo. c & v
cake & valley
Love it. and the cat :)
I love DIY projects. Actually, I´m planning to work on a few ideas the following weeks.
This is a very good one! it looks much better now!
Rocío
fashioningmylifeindc.blogspot.com
Great job, I think I like it better with the gold and polka dots than the original burgundy clutch. Kyle is so cute!
Nicely done! My cat helps me with
my knitting.
Super awesome! I hope you won't mind if I imitate it sometime? (Maybe in my next life when I'm not so busy...) I think Thebe would like to help out.
Brilliant. Absolutely brilliant. Now I'm going to keep my eye out for one of these so I can duplicate the clutch. Brilliant.
Caitlin
re-mix-her.tumblr.com
Thanks for keeping your blog honest with the thumb nail disclosure. :o) I always feel a little irked when I look at tutorials and the author's nails are all perfect. Mine are covered in spray paint or whatever medium I'm working with! I will admit that when I sew with a fresh manicure I have a funny little happy feeling with every little hand movement. :o)
What a wonderful post - informational and seriously funny. The DIY blogger* "*or not. Sounds like work" totally floored me.
Post a Comment